Wednesday, March 18, 2009
Saturday, March 7, 2009
Build Your Own Computer
Step 1: Required Materials
Tools Required
- Screwdriver - A Phillips-head (cross-point) screwdriver is what is used in most PCs.
- Screw Extractor - If you have surgeon’s fingers you may not need this. But, if you’re human, it is likely you might drop a screw into your PC during this procedure and be too big-thumbed to get it out. A screw extractor can help you grab those screws and get them out without messing with the hardware. You definitely do not want to run your PC with loose screws in there. It could cause a short circuit.
- Flashlight - Unless you are in a fantastic lighting situation, you will likely need a flashlight to get a look of the landscape in your PC while you’re working.
- Tweezers - May be helpful for you in switching jumpers later in the tutorial.
Hardware Required
- PC Case
- Floppy Drive (Obsolete in today's computers...for the most part)
- Hard Drive
- CD-ROM Drive
- Processor
- Processor Cooling Fan
- Motherboard
- Memory Modules
- Power Supply
- Video Card
- Keyboard & Mouse
To build a basic PC, you will need at least a motherboard, a memory module (RAM), a processor with cooling fan, a power supply, a hard drive, a floppy drive (Not so much the case with modern computers), a video card and a CD-ROM.
Most electrically sensitive hardware comes in a static bag which is designed to protect the electronics from static electricity shock. Leave your hardware in these bags until you are ready to install them.
Software Required
- System Disk
- Device Drivers (these usually come with the hardware above)
- Operating System (for the purposes of this tutorial, we will assume you are choosing Microsoft Windows as your operating system – PC Mechanic has lots of great information on Linux and other alternatives)
Cables and Miscellaneous
- Drive cables
- Motherboard spacers (usually come with the motherboard, but are used to space the motherboard up off the mounting plate)
- Screws (usually a whole pile of screws will come with your PC’s case, but if you are using a case you happened to have around, you will need to collect some screws)
- Power cords (for both your PC and your monitor. They usually come with the hardware when you buy it, of course)
- CPU Cooling Compound
Once you have your parts, open the case.
Step 2: The Case
Now that the case is open, now is a good time to go through the screw supply provided with the case. These are usually held in a small plastic bag nestled inside the case. Inside this bag you should find:
- Chassis screws - this is the type used to tighten down cards, etc.
- Smaller screws - just like the chassis screws, just with a smaller diameter. It is used to fasten the motherboard in.
- Standoffs - these are screws that are used to hold the motherboard about 1/8″ from the motherboard mounting plate. Their ends have a threaded opening in them that accept the smaller chassis screws. If you have an AT case, you may find small white standoffs. These serve the same function as the metal standoff, but are simply punched through the board and slid into slots on the case. They are rather clumsy to use compared to the metal standoffs, but they get the job done. Lastly, some cases use small metal clip-looking stand-offs. They are pinched together and slipped into small rectangular holes in the motherboard mounting plate and they snap in. These are, too, a bit awkward.
- Washers. These are typically small, loose washers, not the metal kind you’ve seen in your toolbox. These will be used to cushion your motherboard from the screws you will be using to hold it in. Some motherboards have metal plates around the holes to keep the screws from shorting the circuitry, and in this case, washers are not necessary and may not be included.
Now, verify a few things have been done, if they need to be done.
- Clean Case - If the case is new, this should be no big deal. But, if the case has been used before, it could probably stand a cleaning. Clean out the inside with a rag or compressed air. Make sure the fan in the power supply is free of furry dust. Also take a rag and wipe it off.
- Inspect the Power Supply - Make sure it is tightly attached to the case, make sure it is free of dust, and make sure it is set to the proper voltage of your area- 110V for U.S. and 220V for outside countries.
- Inspect Power Switch - Make sure the power switch is securely tightened and correctly connected to the power supply. In ATX cases, the power switch will have one loose wire coming off of it. This wire will then connect to the Power Switch connector on the motherboard.
- Install Feet - These are little tabs inserted into holes at the bottom of the case. The case sits on these tabs when on your desk. If the case has been used before or it is a more expensive case, this may not need to be done.
- Install Case Fan - Sometimes, you may want to install a separate fan that screws onto a rack next to the vent on the front of the case. This helps increase circulation of air through the system. Many cases already have this installed, so you may not need to worry about it. Some like to put a little filter over the hole so as to prevent dust from being drawn in. An ideal and simple setup for proper airflow is to set the front, lower fan to pull air in, and have the higher, rear fan exhaust.
- Free Up the Drive Bays - Brand new (cheaper) cases sometimes have the drive bays sealed with metal plates. It’s the most annoying thing. If you want to install any drives, and you probably do, you’ll need to remove these. Choose the drive bays you want to use (usually the ones at the top on tower cases) and remove the metal plates. These are attached by metal, so they take some cutting, prying and twisting to break them free. Be careful not to hurt the case or yourself. The plate will likely have sharp edges once removed. Better cases have these bays covered with plastic, replaceable plates which are a lot easier and make infinitely more sense.
- Replace I/O Shield. The Input/Output shield is a piece of metal with various holes punched in it that allow for the motherboard connections, such as mouse and keyboard, USB and LAN to poke out the rear of your case. All cases will come with one but since all motherboards are laid out differently, you’ll need to install the one that came with your board. Remove the old one simply by pushing it from the rear of the case inward. It usually will pop out easily, if not use a flat-head screwdriver to pry the edges so it comes loose. Push the new one in from the inside of the case and allow it to pop into place. Check to be sure it is secure.

Sometimes, cases already come with their own power supplies. However, if you are planning on using high-end parts, it is recommended that you buy a power supply that provides more power.
If the power supply is not already installed, you will need to install it now. Here’s how:
- Take the power supply unit and line it up for placement into the PC case. The fan should blow toward the rear and the wires should face forward.
- Insert the PSU into the case. Sometimes this takes a little maneuvering to get it into position.
- Once the unit is in place, check the back of the case and make sure the holes on the rear of the PSU line up with the screw holes on the case. If they do not, you may need to turn the power supply over.
- Using your screwdriver, tighten the PSU down using standard chassis screws.
- Make sure the voltage is set correctly. There is a little switch on the back that lets you switch between 120 or 220 volts. Here in the United States, the voltage is 120.
At this point, your MB shoulld be outside the case. Keep it that way for now, because installing components on it is much easier when it is outside. Here is how to install the CPU.
Most processors in use today use a socket to connect to the motherboard, and the type of socket in use is typically the ZIF socket. The ZIF socket opens and closes using a small lever. When the lever is down, the CPU is locked into place. When in the upright position, the processor is loose and can either be installed or removed.
All modern systems make use of the zero-insertion force (ZIF) socket. Therefore, this procedure is relevant with that setup. To install a processor using this type of interface, follow this procedure:
- Check the pins. Turn the chip over and inspect the pins. Are they bent? They should all stick straight up. If many of them are bent, then it is best to request a replacement processor. If only a couple are bent and the bend is not that much, then you may be able to use a screwdriver to gently bend the pins back into place. Do so VERY carefully.
- Open ZIF Socket. This is done by grabbing the lever on one side of the socket and opening it. Pull the lever from the closed, level position, to the open, vertical position. You may need to pull the lever out a bit before it will open. Do this slowly and don’t force it. You don’t want to break the socket. On the way up, you may experience a little more force. This is normal. The top part of the ZIF socket will slide over a bit.
- Orient The Chip. This involves locating Pin 1 on both the chip and the socket. This is easy to do. The chip is always marked at Pin 1. The mark may be a little dot on one corner, a slightly notched corner, or a mark at one of the pins under the chip. On the socket, there is usually a notch on one corner, or a big “1″. These corners will be matched up for correct installation.
- Insert Processor. Bearing in mind the orientation determined in Step 3, insert the chip into the socket. With a ZIF socket, the chip should install very easily. It should almost fall into the socket with all pins lining up. That’s why they call it the Zero Insertion Force socket. If not, the socket is probably not open all the way. If you do not have a ZIF socket (God forbid!), you need to exercise extreme care. Lay the chip on the socket. Make sure all pins line up. Then, slowly push the chip into the socket. Use your thumb and push on one side of the chip until it starts to go in. Then proceed to another side and repeat. Do this around the chip several times until it is completely installed.
- When done, there should be basically no gap between the bottom of the processor and the socket.
- Close ZIF Socket. Just close the lever. You will probably feel some resistance. This is normal and it should close anyway. If you really need to lean on it, though, check to be sure the chip is installed correctly. When down, make sure the lever snaps into place.
- Some retail processors come with the heat sink and fan already attached to the CPU, in which case you will need to attach the CPU fan to the socket at the same time as you close the ZIF socket. After you lock the CPU into place, take the retention clips on either side of the CPU fan (which should line up automatically for you if you inserted the processor correctly in step 4 above) and push them down until each side clips over the tabs on either side of the socket. Sometimes it takes using a screwdriver as leverage to be able to get the retention clips out and over the tabs, but if you do this be very careful not to slip and jab your motherboard with the screwdriver.
Make sure the processor is clean, you can do this by using isopropyl alcohol and a lint-free cloth.
- Attach the fan to the heat sink. This step is almost always already done for you, but if not, you must do it yourself. This is done using the four screws that came with the CPU fan.
- Clean the top of the processor. Using a lint-free cloth and isopropyl alcohol (or some other non-abrasive cleaning solution), ensure that the surface of the processor is clean and free of dust and finger oil. Do the same to the bottom of the heat sink. Pay attention to the note above on heat pads if your heat sink had or has a rubber heat pad.
- Apply the Heat Sink Compound. Assuming you are not using a heat pad on your heat sink, apply a very thin layer of heat sink compound to the top of the processor core. Only a very thin layer is required. The compound must be spread out evenly across the top of the chip, forming that very thin layer. When spreading the heat sink compound, do not use your finger. Use the edge of a credit card, or you can use a rubber glove or even just a plastic bag over your hand. Do not apply any heat sink compound if you plan to use a heat pad.
- Attach The Heat Sink. Place the heat sink/fan combo squarely on top of the processor, pressing down lightly. Do not do any twisting as you install the heat sink. Press down firmly, but straight down so as to preserve the heat sink compound layer you just applied.
- Secure the heat sink. Most newer heat sinks use a set of clips on each side to fasten itself down. These clips attach to a pair of tabs on each side of the socket. It will probably take a little bit of force to bend the clip down over the tab.
- Double-Check. No compound should have oozed out from the sides. If it did then you applied too much and need to remove the HSF, clean both the heatsink and CPU and start over.
- Attach fan to power source. Unless your CPU fan is powered via a standard power supply plug, it is probably powered by a wire attached to a 3-pin power lead on the motherboard itself. You can attach this now. The CPU_FAN power lead is located near the CPU interface somewhere. The lead will have two small pins on each side, and these pins surround the power plug and the pins are inserted into the holes in the plug. It should be pretty easy and obvious.
At this point, please consult your motherboard manual for placement specifications. Some MB's require that the memory modules be placed in a certain array, while others let you choose any slot. Regardless of type, memory module installation is the same.
- Ground yourself by touching an unpainted metal object. This will discharge any built up static electricity in your body.
- Pick up the memory module by its edges.
- Decide which slots you are going to use and orient the memory module over it. The module slot will have a small plastic bridge which will be off-center in the socket. This will match up with a notch in the module placement slot, thus there is only one way you can insert the module.
- Insert the memory module. Make sure the notches in the RAM line up with the little bumps in the slot.
- Lock the module in place. Usually, all you have to do is continue to press the memory module down until the ejector clips on either side of the memory slot automatically get pushed into the closed position. Sometimes, you may need to help the ejector clips close, but the idea here is that those clips need to close so as to lock the module into place. If they do not close, it is because the module is not inserted all the way into the slot.
- Repeat this procedure for any other memory modules you are going to install.
Once the CPU and memory modules are in place on the motherboard, it is time to install the motherboard.
- Turn your PC case onto its side and move all the power leads from the power supply out of the way so that you have clear access to the motherboard plate. Some cases have a removable slot to place the motherboard, making this process easier.
- Locate the holes on the motherboard and the holes on the case or motherboard mounting plate. You might want to hold the board just above the case motherboard plate and see which holes on the case line up with holes on the motherboard. All motherboards have mounting holes in different places.
- Now gather your standoffs. Some cases have these pre-installed, if not, simply screw them in the holes on the case or mounting plate that line up with the holes on the MB.
- For the holes on the motherboard that line up with an eyelet hole on the case (a hole that is very long so that you can slide things in it), install a plastic stand-off on the motherboard. The stand-offs should poke through the motherboard and expand to keep them in place. Some cases already have these installed, so don't worry about this step if your case does.
- Take the motherboard by its edges and hold it over the case. Align it so that it is properly aligned with the rear connectors facing backward, etc.
- Lower the motherboard into the case and make sure everything aligns.
- Inspect the screws you will use to tighten the board down. If the screws are too wide, place a plastic washer in between, this will avoid in short circuits due to the head of the screw contacting with the MB.
- Tighten the board down. Simple step, just don't tighten the screws too tight.
- If you were installing the board to a removable mounting plate, install the motherboard mounting plate back into the case. On some cases, the plate is installed from the side.
- Double check your work.
Once the motherboard is inside the case, it is time to make the necessary connections to the motherboard.
- Connect the power to the motherboard. On an ATX board, the power connector is one large 20 or 24 wire plug. It is keyed for correct installation. Just plug it in. The board may also require a square, 4pin +12v plug and even a spare 4pin Molex or two. Check your manual to make sure the board is fully powered.
- Connect the CPU fan to the power. Many CPU fans connect to one of the power supply leads. They often, then, provide a pass-through so that you have a connector free for a drive, thereby placing the CPU fan on the circuit to a particular drive. Others have a little 3-pin lead that connects to a small connector on the motherboard itself. Just plug it into the motherboard. The connector is usually labeled CPU_FAN 1, or something to that effect. If your cooling uses the 3-pin type and you are following this tutorial to the letter, then this is likely already done.
- Study the case connectors on the motherboard and match them up with case connector wires.
- Connect the power switch - On ATX machines, the power switch is connected to the motherboard instead of the power supply itself. Consult your manual. The connector is usually labeled PWR_SW, or maybe just PWR, but you must make this connection. Doing this wrong could cause yoursystem not to start later.
- Connect the reset switch. It can be plugged in any way, just make sure you connect it to the right pins. The pins may be labeled RST or RESET, but it is best to also consult the manual.
- Connect Power LED/ Keylock Switch. Many system cases put these two devices on one 5-pin plug, but if you case does not have a keylock, it will be alone. The motherboard will probably be labeled accordingly. Just plug in the plug. If your system has separate plugs for each, connect them separately.
- Connect the hard drive activity LED. Some come on a 2-pin plug. Others come on a four-pin plug, sometimes only two of the pins actually doing anything. Consult your manual, or play with it until it works. It is usually labeled HDD, HDD_LED, or something like that. If this is attached wrongly, the light may either never come on later or will stay on all the time when the PC is running.
- Connect the PC speaker. Most cases put this onto a 4-wire plug. Just plug it in to the 4 pins on the motherboard. Other cases put the speaker connector on two 1-wire plugs. In this case, plug them into pins 1 and 4. I never could figure out why they did that…
- Double-Check your work, as always. Note that if an LED does not light up, its case connector needs to be flipped 180 degrees.
Step 9: Configuring the CD Drives and Hard Drive(s)
Your motherboard has two built-in IDE channels, each supporting two devices. If two devices are on one channel, one must be the “master” and the other the “slave”. Usually, your primary hard drive (the one which contains the operating system) is the master and the other drive is the slave. If you only intend to install one hard drive and having nothing else on that IDE channel, then you can select the “cable select” setting for the drive, which tells the drive it is alone on the channel.
You can attach any IDE device onto your IDE channels in any order. But, it is recommend you use IDE1 for your hard drives and IDE2 for your CD drives. It is always best to keep the CD drives on a separate channel from the hard drives.
Configuring these drives is very easy. Often the jumper settings are printed on the top of the drive itself. On CD drives, the settings are described right above the jumper pins. On hard drives, the information is printed on the top of the hard drive, if it is printed at all. If not, then consult the manual for it or go online to try finding the specs. The manuals will also outline any special jumper settings such as use of the limiter jumper on Maxtor hard drives.
If you are using SATA Hard drives, you are in luck. Because each SATA drive uses its own channel, there is no need for jumpers or worrying about master/slave relationships.
Step 10: Installing the Hard Drive
***Some cases give room under the power supply to install a hard drive. Bad idea. A power supply is like a magnet, and magnets and your data do not go together. Don’t install a hard drive anywhere near the power supply. Keep your hard drive near the front of the case.***
- Slide in the hard drive. If you are using a removable drive rack, just push the drive into the rack so that the screw holes line up. If your case has the drive rack as part of the chassis, then just lift the drive into the case and line up the screw holes on the drive with the drive rack. Be sure the drive connectors face toward the back of the case.
- Fasten the hard drive into place using your screws. With or without removable racks, the placement for the hard drives is obvious.
- If using a removable drive rack, you can now install the rack back into your case. Some racks are fastened into place using a simple thumb lever. Others need to be screwed in.
- If you have any other hard drives which you are installing as you build your PC, then repeat the 4 steps above for the other drive.
- Attach the power cable. Choose an unused power lead from the power supply and plug it into the power plug on the hard drive. The plug will be keyed so that it will only go in the correct way. SATA connectors are thin and black; they are obviously different from other white Molexes.
- Attach the ribbon cable to the hard drive. The ribbon cable goes from the primary IDE controller of the motherboard to the drive, usually labeled IDE1. Make sure the red edge of the ribbon cable is aligned with Pin 1 on the drive ribbon connector. As for the cable itself, usually you have two plugs closer together on one end of the cable and then a third plug on the far end of the cable. The far plug plugs into the motherboard. Of the two remaining cables, there are no requirements as to which plug to use on which hard drive. If you are only installing one hard drive, just use whichever one of those plugs reaches the drive best without stretching the ribbon cable out. If you are installing two hard drives, then plan it out so that you can use both connectors in whichever order works best. With SATA the ribbon cable goes to an SATA controller. Start with SATA_1 and move on if you have multiple drives.
Step 11: Installing the Video Card
If you do not have a video card and your motherboard has on-board video, skip this step. If you did purchase a video card, here's how to install it.
- Find an expansion slot ideal for your video card. You can consult the bottom right image for a look at the three types of video card slot types: ISA, PCI or AGP. Most video cards in use today use the AGP or PCI-Express slot.
- Remove the case insert that corresponds to the slot on the motherboard. This is usually done by unscrewing, but some cases have punch out inserts. If unclear, what we are referring to by “insert” is the small plate which covers up the rear slots on your case which your expansion cards will emerge from.
- Insert the video card in the slot. You might need to rock the card in, inserting one end first, then rocking the rest of the pins into place.
- With the video card inserted into the correct slot, it will probably sit there with no support at all. It is still, though, necessary to tighten it in using a screw. The card’s metal plate will have a notch for a screw and it will line up with a screwhole on the side of the expansion hole on the rear of the case. Just insert a screw into that hole and tighten it.
- Double-check your work. Make sure the card is securely in place and, if your video card has a cooling fan on it, make sure no ribbon cables or power leads are getting into the fan blades.
Here is a list of everything that you should make sure of after following the previous steps.
- Drives properly connected to the power supply
- CPU fan attached to the power supply or to the power connector on the motherboard
- If this is an older AT machine, ensure the P8 and P9 main power connectors are installed properly, with black wires in middle.
- The 110/220 volt switch on the back of the power supply is configured properly for your area
- Ribbon cables attached correctly and securely.
- All connections tight, no connectors off by one set of pins
- If there are any key motherboard settings which are jumper-controlled, ensure these settings are correct
- No wires or ribbon cables protruding into fan blades
- Power switch connector on ATX machines properly connected to the PWR_SW pins on the motherboard. If this is not properly done, the machine may not even turn on when the switch is pressed.
Let’s get everything connected and prepared to turn it on:
- Connect your mouse and keyboard
- Connect your monitor to the video card and connect the power cord to the monitor.
- Connect the power cord to your power supply on the PC itself.
Okay, now for boot up time!
- Stick your system disk into the A: drive( This corresponds to the floppy, but floppy drives are obsolte now!). You should have prepared or gotten a system disk in the first step of this tutorial. If you are using a bootable CD-ROM (as is the case with Windows XP) then just stand by on this because the CD drive will not be openable until the power is on.
- Turn your monitor on and let it heat up a few seconds before proceeding. Heating it up for a few seconds ensures you don’t miss any potential error messages because the CRT tube is not ready to display an image.
- Before hitting the power switch, take note of what to expect. If you notice something awry right away, you may need to quickly turn the PC back off. Here’s what to look for:
a. The power LED should turn on
b. The CPU and Power Supply fans should start spinning
c. The hard drive should power up.
d. You will see the video BIOS screen first, then you will see the BIOS screen and it will proceed to count the memory.
e. You may hear one beep from the PC speaker. If you get more than on beep, something is wrong.
f. You may also get a “CMOS checksum error” or another error saying the CMOS or time isn’t set.
g. Know what key(s) to hit to enter CMOS setup. This will be shown on the bottom of the screen usually during the memory count. You will want to press the stated key combination to enter setup immediately because CMOS setup is the next step.
h. If you hear any weird sounds such as grinding, scraping, or loud whining, be ready to turn the system off immediately.
i. Keep in mind that if you miss the stated sequence to enter the CMOS setup before the boot sequence moves on, there is nothing wrong with just hitting the reset button and rebooting until you do catch what it is. It will not hurt your PC to reset it immediately or turn it off quickly if you notice a problem.
- Press the power switch. If it powers up, observe the system closely. As soon as the BIOS screen appears, press the appropriate key(s) and enter CMOS setup. If you miss it, don't worry, just hit the reset key and try again.
- If everything started up as expected and you successfully got into the CMOS setup screen, just let it sit there while you take out a flash light and inspect the system as it is running. Make sure all the fans are running. Make sure everything is operating smoothly.
When you get into CMOS for the first time, do the following:
- Go into your Standard CMOS Setup screen. Ensure your video settings are correct (typically EGA/VGA) and that your floppy disk is properly set to the size you are using (usually 1.44M). You will see settings for IDE Primary/Secondary Master/Slave. If these items are not already properly set for the hardware you have, have the BIOS auto-detect your drives for you. Don't worry about setting the time, you can do this later using your operating system
- Unless your board has jumper-controlled processor and voltage settings, you will need to set these options in your CMOS now. Just to be safe, set these settings to AUTO. You will most likely not have a jumper-controlled processor, so skip this step if you don't.
- Confirm your boot order. One of the screens in your CMOS (many times the Advanced Features screen) will have a boot order option. This controls the order in which the PC will look for a copy of something to boot off of, whether it is a full operating system or just a diskette or CD. In a little bit you will be installing your full operating system and will need to boot the system beforehand. If you are using a standard system diskette, make sure A: (or your floppy) is enabled to be first in line(Once again, you will most likely not have a floppy drive). In this case, you might want to also check to be sure that if there is a setting to disable seeking out the floppy altogether, that is set to indeed seek out the floppy drive (some people set this to off so as to make the boot process faster, but you cannot do that while building). If you are going to be booting from a CD (as is probably the case if you will be installing Windows XP) then make sure your CD-ROM is first in line.
Step 15: Installing the Operating System
Congratulations! Now that you've made it this far, all of the hardware aspects of the build are complete.
If your computer is still on, insert the CD-ROM that contains your operating system installation and reboot. Make sure you have the CD-ROM set to boot first in your CMOS settings. Once the computer reboots, it will recognize the CD-ROM and the program within it will take you through the steps of installing your new operating system.
Final Step: Cleaning Up
Once you are welcomed to your virgin version of your operating system, there's a few things you must do.
- Enable your firewall.
- Next, connect to Windows Update by visiting www.windowsupdate.com using Internet Explorer. Scan for Updates and then go directly to the critical updates and service packs section. If there are any major service packs listed, install them now and reboot.
- Install your motherboard’s chipset drivers. Most likely, your motherboard came with a CD which contained drivers for the chipset as well as any integrated hardware. You can install this software and drivers now from the CD. You should also check the motherboard manufacturer’s website and see if there is any updated driver software since the CD was created. After installing these drivers, reboot again.
- Go back to windows update, and install any other updates, including DirectX.
- Now, visit the website of your video card manufacturer and download the latest drivers for your video card. Install them. You will likely need to reboot again.
- Lastly, you should install any remaining hardware and drivers for your computer. Install the sound card drivers as well as the drivers for any remaining hardware. Visit the manufacturer’s website to see if there are more recent versions of each. You may need to reboot after each installation. Simply go through each until each component in your PC has the required drivers installed.
- Finally, if you are running Windows, activate it. The safest way to activate it is online, and Microsoft makes this an easy process.
Wednesday, March 4, 2009
The New Tower

After 8 years of buying second-hand parts to update my once new computer, I figured it was about time to start fresh. I didn't just go for a store bought computer, which are way over-priced compared to a custom built computer costs a fraction of the price for the same performance. I built this new computer about a week and a half ago, and here are the specifications:
-Antec Nine Hundred Gaming Case
-Apevia Iceberg Power 680 watt power supply Image
-GIGABYTE GA-EP45-UD3P ATX Motherboard Image
-Intel E8400 3.0Ghz Dual Core processor Image
-Corsair Dominator 2GB DDR2 1066 Dual Channel RAM Image
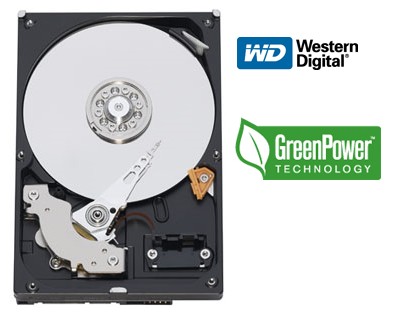
-Western Digital 500GB SATA HDD Image
-NVIDIA 9800 GT 512MB GDDR3 PCI-E x 16 Image
-LITEON DVD/CD-RW drive Image
-Thermaltake CPU Cooler Image
Thursday, February 19, 2009

What happened in 1969? On June 20, Neil Armstrong stepped on the Moon's surface. How exactly did we as a country get there? It wasn't a bunch of English majors or people with degrees in Broadcast Journalism or History. It was America's mathematicians and engineers; those geeks that nobody really liked that were thought to be lame and good-for-nothings. America today has maybe one of the crappiest education systems on the planet, and less and less students are seeking careers in degrees that will truly make us the most advanced country in the world. What happened in the 60's that sparked our willingness to land a man on the Moon? It was the Russian launch of Sputnik, and there was no way the U.S. was gonna let the Soviets get away with it. Thus, the U.S. got on the ball and landed American astronauts on the friggin' surface of the Moon! We need another Sputnik, and maybe it will kick-start America's creativity and desire for technological advancement. I'm sick and tired of hearing about India's and China's engineers. Simply, we as a country need to get crackin'.
Sunday, February 8, 2009
Setting up your computer to be a media server for XBOX 360 and PS3
Very Important: Your PS3/XBOX 360 must be connected to the same network as your computer, this can be done by simply connecting it to the same router that your computer uses. Make sure this is done before anything else, your PS3/XBOX 360 must be connected to the network before continuing the following steps, otherwise some features in Windows Media Player will not show up or be enabled.
- Download and install Windows Media Player 11 (as I'm sure many of you already have).
- Click on the Library tab
- On the left you'll see a tree structure. Right click on Library in the tree structure.
- Click Media Sharing
- Enable your options, what folders, devices, etc.***
- When your PS3 turns on and scans, Windows will pop up and ask if it's ok to allow the device. Allow it.
Also, Windows Media Player does not have to be open for media sharing to function. The computer and PS3 only need to be connected to the same router. The router should be UPnP enabled (Universal Plug-n-Play, don't worry, most routers now-a-days are UPnP).
Be sure to remember to add files to the Windows Media Player library so they will be shared. Media Player can automatically scan for files. When I browse files on my PS3, I tend to browse by folder, so I don't worry about organization within Media Player or playlists.
***If you are not sure on what to do on this step, do the following:
1) Click on Tools in the title bar
2) Click on Options
3) Click on Library
4) Click on Configure Sharing
5) Click on Settings
6) Make sure Allow New Devices and Computers Automatically is checked
7) Make sure All Ratings are checked
8) Click on OK
Wednesday, February 4, 2009
Say Hello to Windows 7
Microsoft, despite not releasing the price and ship date of the new upcoming Windows 7 (codenamed Vienna), has described in detail the different versions of the new operating system. Windows Vista was criticized for its performance. Compared to Windows XP, Vista was a resource hog, arguably had too much security, and it had problems after problems with hardware and software compatibility. Windows 7 plans to change all that, once again releasing an operating system that will have the same impact that XP did. I believe that Microsoft plans to diffuse the increasing popularity of MAC computers and Linux (which I also use), by releasing this totally revamped system.
What are the new versions?
Windows 7 Starter, Windows 7 Home Premium, Windows 7 Professional, Windows 7 Enterprise, and Windows 7 Ultimate. Windows 7 Home Basic will also be sold, but only to emerging markets.
So what versions will I able to buy in a store?
Consumers will only be able to buy either Windows 7 Home Premium or Windows 7 Professional at retail—and deliberately so; Microsoft wants to try and limit consumer confusion by only putting the two versions in front of consumers. Windows 7 Ultimate will be included on both discs, but will require a user to go through the upgrade process, either online or offline, to access them.
Except for Windows 7 Starter, each version will be available in either a 32-bit or 64-bit version.
It should also be noted that Microsoft sees the progression as a good-better-best scenario: Home Basic is better than Starter, and Home Premium is better than Home Basic. Windows 7 Professional is positioned as a step up from Home Premium, and the Enterprise and Ultimate editions are the premium Windows 7 offerings.
Let's talk upgrades. I'm a Vista user; can I upgrade directly to Windows 7? In each case, you'll have to pay to unlock each additional operating system: in other words, to jump from Starter to Home Premium to Ultimate will require two paid upgrades. Whether Microsoft will offer any discounts for those upgrades is unknown. Can XP users upgrade to Windows 7? Can Vista users perform an in-place upgrade? For PCs running Windows Vista, consumers have the option of an in-place upgrade of Windows 7, keeping the data and programs intact, or performing a clean install of Windows 7. The upgrade maintains all your settings, installed programs, files, and customizations, although Microsoft recommends that you back up your data. How will the upgrade process work?
Not without buying a Windows 7 disc and installing. But once you've purchased and installed Windows 7, you can upgrade to different versions using what's called Windows Anytime Upgrade, or WAU. In this case, the "base" versions are Home Premium and Professional, or the Starter version that will come preinstalled on lower-end computers. We'll talk about Starter later. It appears that Home Premium Users will be guided to upgrade to the Ultimate version, and that Business users will be encouraged to upgrade to the Professional Edition.
Yes, and yes. Customers can purchase upgrade media and an upgrade license to move from Windows XP to Windows 7, according to Microsoft; however, they will need to do a clean installation of Windows 7, including backing up data, installing Windows 7, and re-installing the programs, and then the backed-up data.
With Windows 7 WAU, there are two processes by which a customer can upgrade from one edition of Windows 7 to a higher edition of Windows 7:
Windows 7 appears to be the real deal. It is only a matter of time to see wether this new operating system flunks, or if Microsoft once again revolutionizes home computing. For more information, go here.
Tuesday, February 3, 2009
A small (and constantly updated) list of rants.
-When people say "Ohhh, I can't wait!" Because I'm sure they can.
-When people buy hotdogs but no buns, or vice-versa.
-Vegetarians/Vegans (because it's "healthier").
-Vegetarian/Vegan Recruiters.
-PETA.
-When you don't check the temperature of the shower head water before getting in,
so when you're in on the opposite side of the shower controls, there's a waterfall of lava.
-Hannah Montana.
-When you rip open a bag of cereal abruptly, where each time you pour, some of the poor cereal pieces fall into the abyss that is the bottom of the box.
-When people ask for a favor online, which is immdiately followed by "Thanks!", so you cannot refuse.
-When someone fatter than you gives you diet advice.
-When people make some pictures private on Myspace, even to friends, so only they can view them.
-When people set ALL of their pictures to private on Myspace, so only they can view them.
-When people get denied a job because they are "overqualified".
-Ridiculously large signatures.
-That George Bush still hasn't been shot.
-When people post URL's that aren't linked, so you must copy and paste to view the mentioned website.
-The fact that batteries don't last forever.
-The French (calm down, people FROM France, so it's OK.)
-Opening a DVD case, only to find that another movie resides in it.
-When people don't clear their microwave numbers.
-When people (mostly women) don't clear the damn shower drain after they finished washing off 3 pounds of hair.
-When I am handed the receipt and change at the same time in a bundle.
-People who ask "Can I ask you a question?" I think you already did.
-When you score on yourself in foosball or air hockey.
-Websites with huge pages that require horizontal scrolling.
-When people use their credit cards at a store line, only to find that their balance is zero.
-When people use "We" when speaking about a certain team, like as if they are part of it.
-When people are walking and walk as if they do not want to arrive at their destination.
-How Minesweeper is harder than clearing an actual mine field.
-When students demand from their parents money for getting good grades, which is something they should be doing regardless.
-Those gay Emo kids
-People that still believe we didn't go to the moon.
Just to get this blog down...
NVIDIA Tesla Super Computers

NVIDIA® is taking a leap into personal supercomputing. They have introduced the world's first teraflop many-core processor. NVIDIA® Tesla™ GPU computing solutions enable the necessary transition to energy efficient parallel computing power. With 240 cores per processor and based on the revolutionary NVIDIA® CUDA parallel computing architecture, Tesla scales to solve the world’s most important computing challenges—more quickly and accurately. Most of today's high-end computers have four cores, these babies have up to 240. You do the math. For more information, go here.
Intel's i7 Processors
 Intel currently has had the new i7 brand of processors out for a while, but they continue to out perform any other brand of processors with no response from the other major companies such as AMD. There are many performance charts out there proving Intel's mastery of CPU engineering, such as the charts at Tom's Hardware. Took a look at it here.


